Design Your Own Project
Project Description: For the design your own digital arts project each student was able to choose to make a project of whatever medium they wanted. I chose to make a video animation of me skateboarding. I used Adobe Flash CS4 to make the animation. The first and hardest step was converting my video into an flv file so I could import it to flash and start my animation. Once my video was in flash I started to animate, for each object I animated I made a new layer. For each frame I added a blank key frame, so my previous drawing wouldn't stay on the video and I could make the animation move and change, I did that for each part I animated. Lastly I imported the video into windows movie maker so I could flip and speed up my animation. We had a peer critique so we could get helpful input on each one of our projects from an outside source.
Reflection Questions:
- I chose to make an animation of me skateboarding because I've seen tons of skate animations on Instagram and I've always thought that they look really cool and creative. It took me a while to figure out what parts of the video I wanted to animate. Then I had the idea of animating me landing and sliding on the rail so I animated those two pieces. But I wanted more in so I thought to animate the take off and roll away.
- I really enjoyed the experience I had while making this project. I've never had the freedom to choose what I wanted to do for any large assignment in school, that was a new experience that I really enjoyed. I liked how I was creating something purely off my ideas there was no criteria that I had to make my project with. There wasn't a risk factor while I was trying new or different things in flash since all I was worried about was getting the project done on time. overall I really enjoyed my experience making this project and I'm happy that it opened up all new creative outlet for me.
- I plan to use these skills in the future to continue to learn about video animation. The next time I plan to use the skills is in our next design your own digital arts project at the end of the year. I'm very excited to make another animation of me or one of my friends skating and make it even better and more refined that my last one. I also hope to get Adobe Flash or another animation program so I can continue to make these since they're so fun. If I get good enough at making these I might be able to have people pay me to make them for those people.
Understanding Scale and Proportion: Landscapes
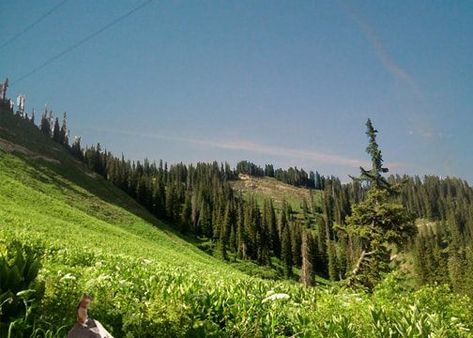
Reflection:
Scale: Scale is the size of an object.
Proportion: Proportion is the relative size of parts of a whole.
Foreground, Middleground, Background: Foreground is the visual plane closet to the viewer. Middleground is located in between the foreground and the background. Background is the visual plane farthest from the viewer.
Tools I Found Helpful: I found the quick selection and the magic wand tool the most helpful while I was working on this. (Plus those were the only two tools I used.)
Zipped Files vs. Extracted Files: Zipped files take up less storage space and transfer from computer to computer more quickly than extracted files. Zip files are useful because they pack one or more computer files into one file/folder.
Photoshop Tutorials - How to Warp Teeth

Original
|

Photoshopped
|
How I warped the teeth: First I opened my teeth image in Photoshop and made a selection of the tooth I wanted to warp with the pen tool. I set the feather radius to "0" second I made a new layer via copy of the selection third I went to edit, transform, warp, on the new layer. Next all I did was drag and warp the tooth how I wanted.
Photoshop Tutorials - Hair and Eye Color Changed
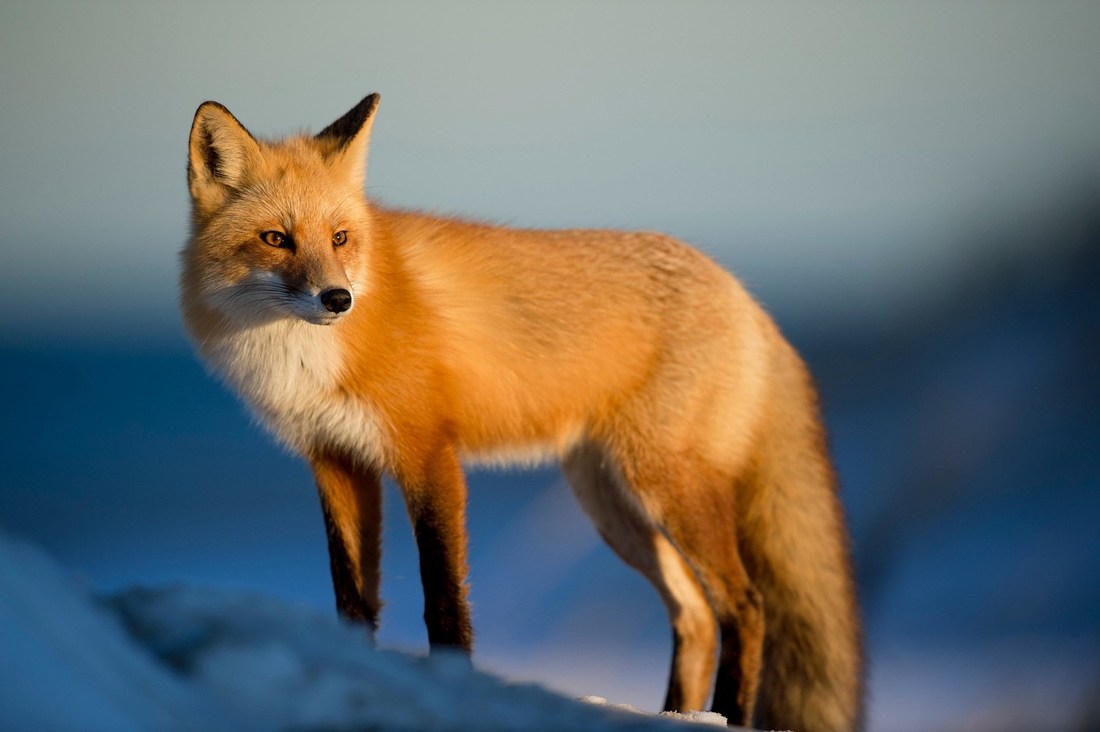
Original
|
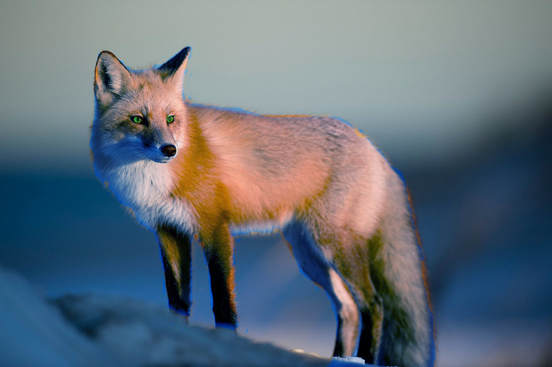
Photoshopped
|
How I changed the hair color: I started by opening my fox image in Photoshop and making a new layer. I changed the layers setting to "soft light," next I selected the brush tool and a color that I liked. After that I selected a soft brush and changed the settings to: Hardness - 0% Opacity - 50% and Flow - 100% Then I started painting the fur and I was done!
How I changed the eye color: I started by unlocking my already photoshopped fox image to make it a layer. Then I made a selection of the eye with the pen tool and set the feather radius to "3." Next I pressed Ctrl-U to bring up the hue/saturation settings and adjusted the hue to change the color of the eye. I repeated for the other eye.
Art History
Reflection Questions -
- Do you feel you met or approached the project rationale? Use evidence explaining why or why not. - Yes I do feel that I approached the rationale but I don’t think I met it. I think this because I completed the project and got an “A” but I didn’t do my best work.
- What is considered art - Art is intentionally arranged elements in a way that shows/appeals to the senses or emotions of one person.
- How does context affect works of art - Context affects works of art by changing the meaning of the piece that someone is making. Context helps originate a piece of art it is not a part of the actual work.
- Why would context matter when interpreting art - Because the context is what originates the work. It is what makes someone add the certain aspects of the piece to it. So when interpreting art you want to think of the context that it was created in.
Letter Portrait
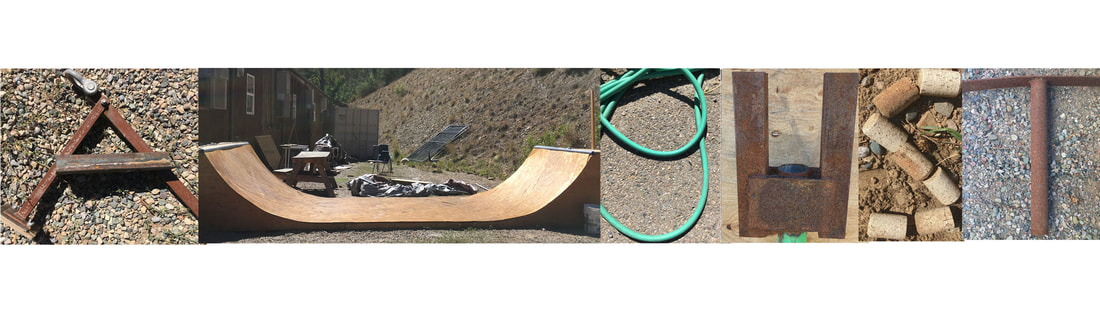
Project Description -
When I started this project I went around our school campus and took photos of objects that made the letters of my name. Once I had all my photos I uploaded them to my computer then I started editing. I used photoshop for this project I started editing by resizing my images and arranging them into a nice line. Lastly I added filters to my letter portrait, then I was done!
When I started this project I went around our school campus and took photos of objects that made the letters of my name. Once I had all my photos I uploaded them to my computer then I started editing. I used photoshop for this project I started editing by resizing my images and arranging them into a nice line. Lastly I added filters to my letter portrait, then I was done!
